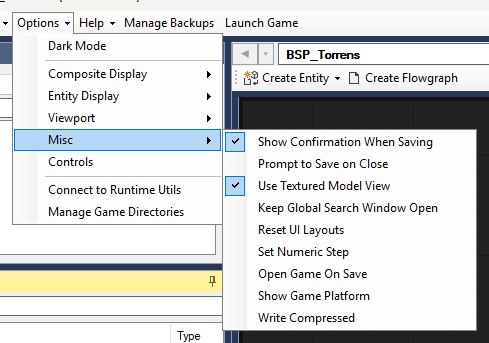
The Launch Game button at the right-hand end of the main toolbar (beside Manage Backups, shown below) opens the Launch Game dialog. From here you choose whether to boot straight into a level, toggle launch options and scripting helpers, then hit Start Alien: Isolation. The button is only enabled for Steam, Epic Games Store and GOG installs, because launching works by patching the game executable.

Options patch the game install and (for some UI mods) replace GFX files under DATA/UI.PAK. Some options aren't supported on all platforms — the Scripting Helpers and Cinematic Tools are Steam-only. The dialog itself is shown below: the level picker sits at the top; a single Launch Options group holds the four UI mods at the top of its left-hand column, with the engine patches, debug tools, Cinematic Tools and Possess Characters filling the rest of both columns; the Scripting Helpers group sits underneath; and Start Alien: Isolation is the button along the bottom. Options that don't apply to your install are greyed out; on the Steam install pictured, with the bundled tools present, everything is available.
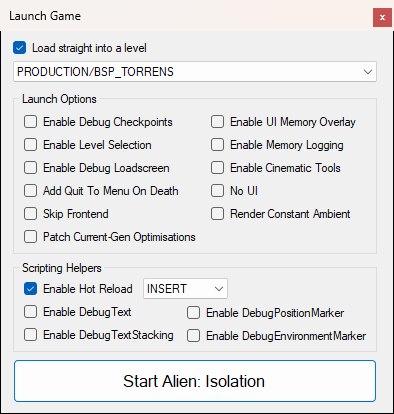
The Launch Game dialog on a Steam install with a level chosen; Possess Characters, Enable Hot Reload, Unlock Mouse and Cap FPS are ticked, so their dropdowns are live.
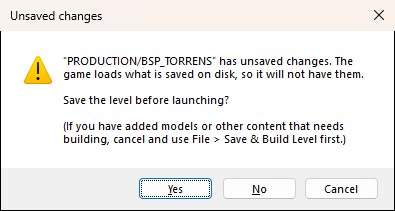
The game loads levels from disk, so if the level you have open has unsaved changes when you press Start Alien: Isolation, OpenCAGE asks whether to save it first. Yes saves the level (as File → Save Level does) and starts the game, No starts it without saving, and Cancel does neither. If the save doesn't go through, the game isn't started either. If you've added models or other content that needs building, cancel and use File → Save and Build Level first (see Save and Build).
While the game is running with Enable Live Link ticked (Steam only), a Live Link button joins Launch Game on the toolbar, to its right. A game started without it, or with Cinematic Tools, gets no button.
Tick Load straight into a level and pick one from the list beneath it (the list is greyed out until the box is ticked) to have the game boot directly into that map — useful for testing a specific level without playing through from the start. Leave it unticked and the game starts at its main menu (FRONTEND) as normal.
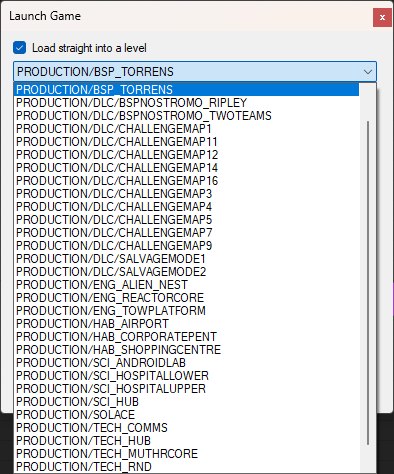
The level list on a retail install: the campaign maps plus the DLC ones under PRODUCTION/DLC. FRONTEND is never offered.
The list holds every level in the current game install, including any you've made with Create Level. OpenCAGE preselects the level you're editing (PRODUCTION/BSP_TORRENS above), otherwise your last used choice, and the selection is remembered for next time.
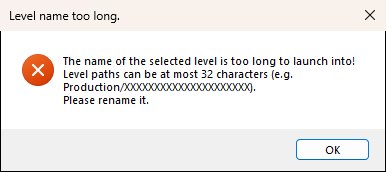
Booting into a level works by writing the level's name into the game executable, and that space is fixed: a level path longer than 32 characters (for a shipped level that's Production/ plus the folder name) can't be launched into, and OpenCAGE will refuse with the message shown below rather than corrupting the patch.
These are the four boxes at the top of the left-hand column of Launch Options. They swap in OpenCAGE's modified pause/frontend/loading/game-over menus by patching GFX files inside UI.PAK (see also the UI Editor), and the file is rewritten the moment you tick or untick a box, so the change is in place whether you launch from this dialog or not:
The rest of Launch Options — Skip Frontend and Patch Current-Gen Optimisations under the UI mods, plus the debug tools, No UI and Render Constant Ambient in the right-hand column — are written into the game executable the moment you toggle them. OpenCAGE warns if it can't write, which usually means the game is still running. Cinematic Tools and Possess Characters are the exceptions: they're only applied when you launch.
Mem_Replay_Logs folderHot reloading has moved into the Scripting Helpers group, where you can also choose its key.
With Possess Characters ticked (Steam only), you can take control of a character in the running game — the alien, an android or a human — and walk it around the level yourself. Pick the key that opens its menu from the dropdown beside the box: F6 by default, with the same choices as the hot reload key. Like the scripting helpers, it runs in OpenCAGE's plugin in the game folder, but it isn't one of them: it stays available with Cinematic Tools ticked.
In the game, press the key to open the Possess a Character menu. It lists the characters the game is running, with what each one is and how far away it is. The one you're facing comes first (marked ahead), then the rest from nearest to furthest. Click one, or pick it with the arrow keys and Enter, to take control of it. While the menu is open the mouse cursor is shown and the game doesn't see your keyboard or mouse. Press the key again or Escape to close it.
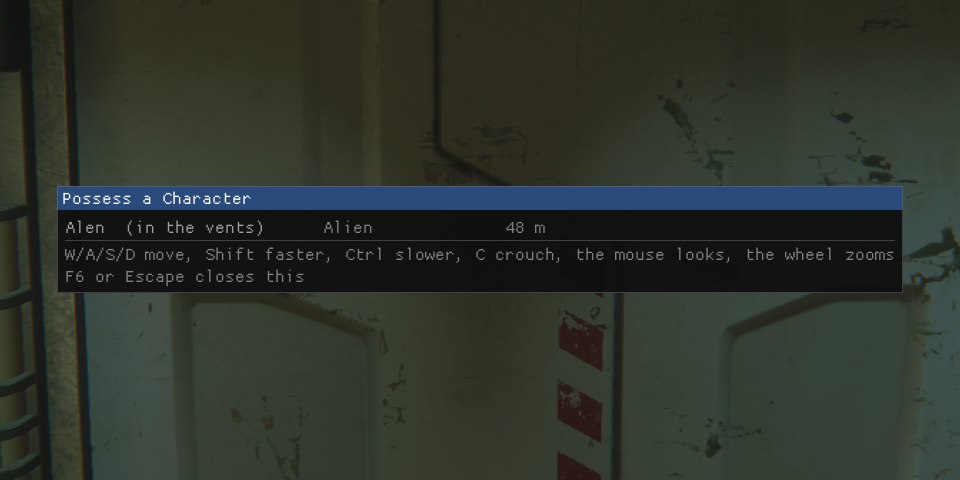
The menu in a Survivor map, with the alien still moving through the vents: it's listed, but greyed out until it comes out.
Once you have a character, the camera sits behind it. W, A, S and D move it relative to the camera, Shift makes it go faster and Ctrl slower, and the mouse turns the camera around it. Roll the mouse wheel to bring the camera closer or take it further away: it goes from 1.5 m to 10 m behind the character (4 m to begin with), and stays where you leave it for the next character you take. It moves with its own animations and speeds, along the routes the level's navigation mesh allows it, so the alien moves as the alien does and can't walk through walls. Let go of the keys and it comes to a stop. C gives it the game's own order to crouch, or to stand up again, but the character only looks any different if its animations include crouching: the humans tried so far (the Torrens crew, and the spacesuited crew on LV-426) stay upright, and the alien doesn't take the order. Your own character stands still meanwhile: the game doesn't see your keyboard (apart from Escape, for the pause menu) or mouse. To let go, open the menu and choose Let go, or take another character; the character's own behaviour then takes over again.
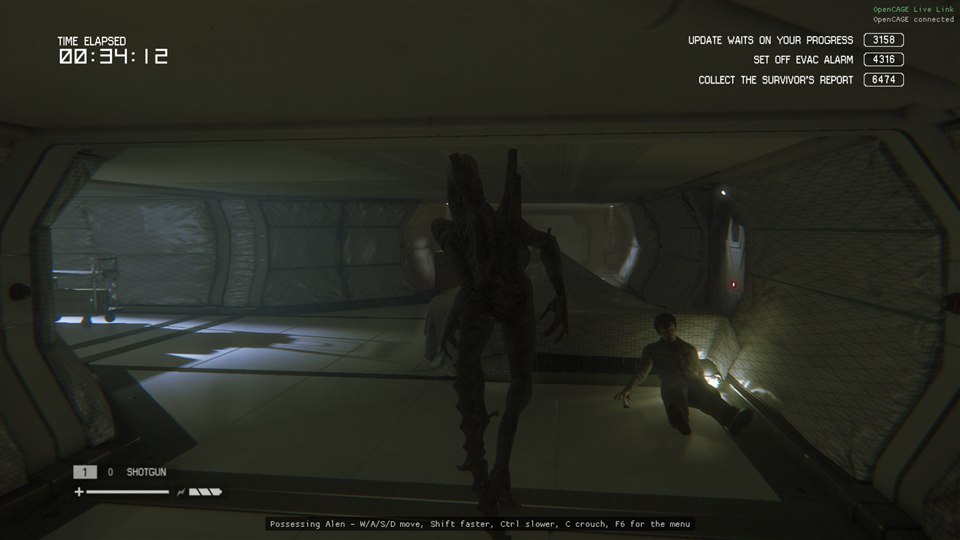
The alien possessed: the camera follows behind it, and a note at the bottom of the screen gives the keys.
The Scripting Helpers group adds runtime tools to the game that make script iteration faster. They're provided by a small plugin OpenCAGE copies into the game folder when any helper is enabled, or Cinematic Tools or Possess Characters are (and removes when none are), configured through OpenCAGE.RuntimeUtils.ini beside it. The plugin only supports the Steam build, so the whole group is greyed out on other platforms. The dropdowns beside Enable Hot Reload, Unlock Mouse and Cap FPS only come alive once their box is ticked, as shown below.
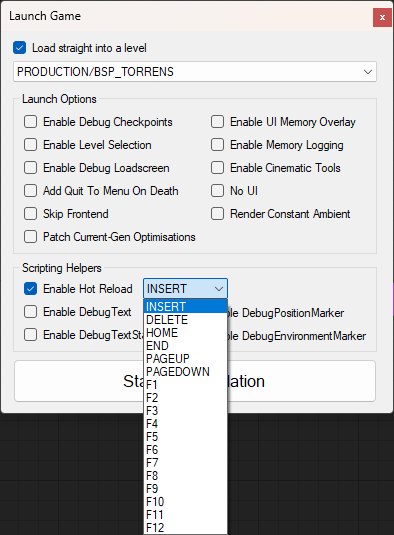
The hot reload key dropdown, open: INSERT is the default, with DELETE, HOME, END, PAGEUP, PAGEDOWN and the function keys as alternatives.
The debug entities exist in the shipped scripts but draw nothing in the retail game; these options bring them back, so a script that places a DebugText shows its message on screen as it would have in Creative Assembly's own tools. See Debug Text & Markers for what each one draws, and how to show a script's values with them.
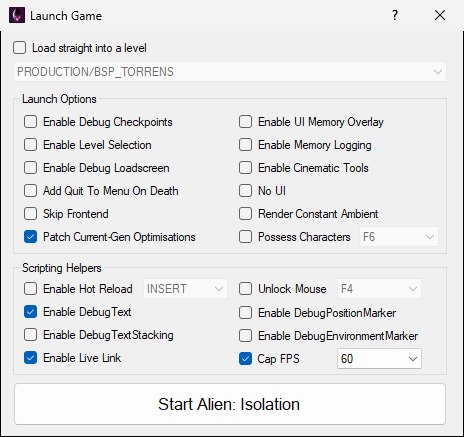
Enable Live Link, the last box in the left-hand column of the Scripting Helpers group.
A game started from Launch Game runs either Cinematic Tools or the scripting helpers, never both. They're for different jobs, filming and working on a level's scripts, and both take over the game's camera: Cinematic Tools with their free camera, and Live Link with its camera sync.
While Enable Cinematic Tools is ticked, the Scripting Helpers group is greyed out and its title says why. None of the helpers run in the game, Live Link included, so OpenCAGE shows no Live Link button for that game. The boxes you've ticked in the group stay ticked, and work again as soon as you untick Enable Cinematic Tools. Cinematic Tools still get OpenCAGE's plugin in the game folder, which streams in the level around their free camera.
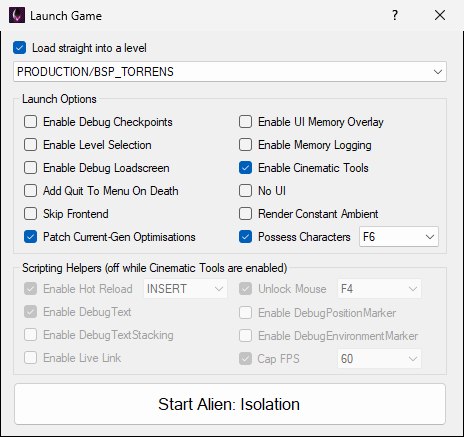
Enable Cinematic Tools ticked: the Scripting Helpers are greyed out, keeping their ticks for the next game started without Cinematic Tools. Possess Characters isn't a scripting helper, so it stays available.
Open Game On Save never starts Cinematic Tools, so a game it starts runs the helpers as they're ticked, whether or not Enable Cinematic Tools is.
Outside the Launch Game dialog, under the toolbar's Options dropdown (shown below):