The CAGEAnimation Editor is a timeline UI for CAGEAnimation function entities. It edits float curves over time, string events that fire pins on the flowgraph, and animation-entity bindings used by play-animation nodes — and, with Animation Mode, plays the result in the Viewport and turns moves made there into keyframes.
This is not the same as the Animation Editor, which browses the animation clips in ANIMATION.PAK. The CAGEAnimation Editor works on a scripting entity inside a composite.
While the editor is open you can jump to linked entities (for example from an Animation Entity binding) without closing the window. Edits still go to the original CAGEAnimation by ID.
The window is split into three main areas, shown below on a retail cutscene animation:
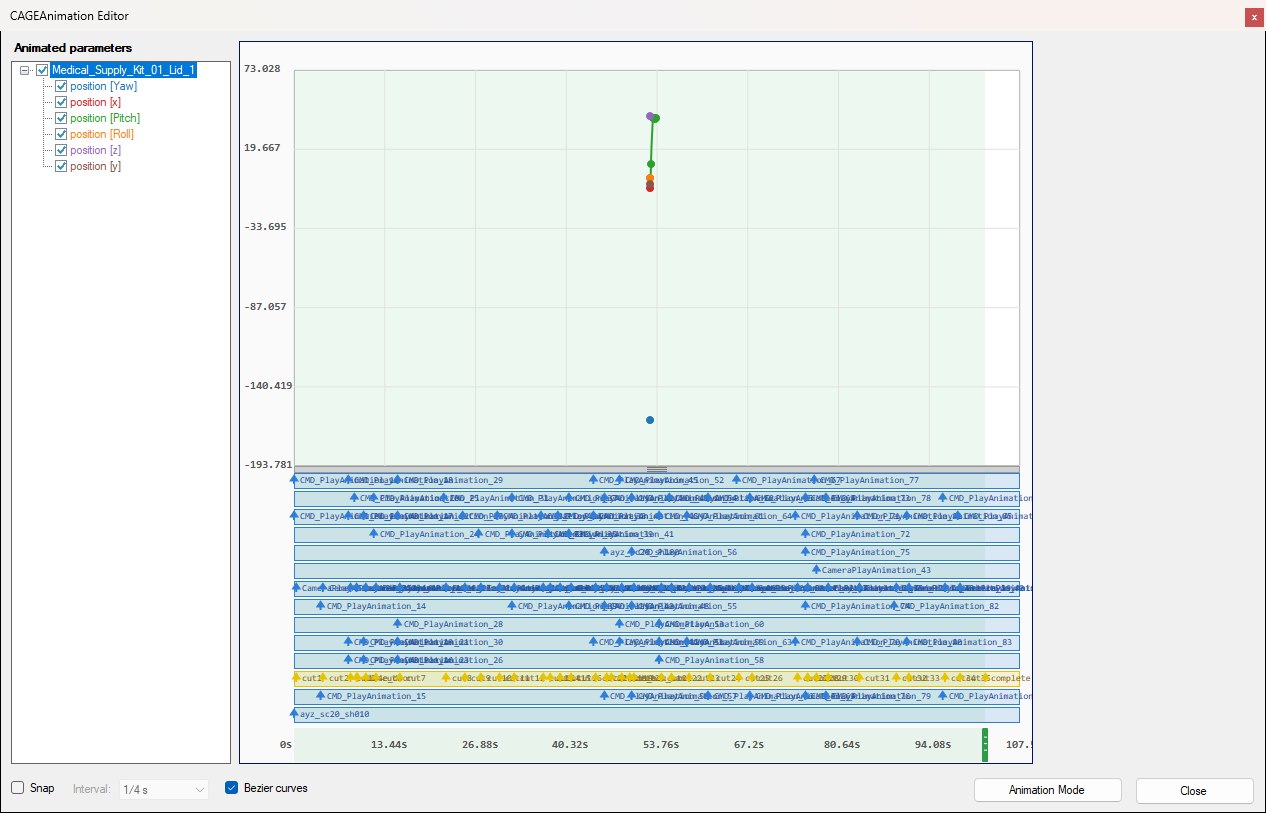
cutscene_20 in SCI_HUB: six position tracks on the medical-kit lid, one yellow string-event lane and thirteen blue Animation Entity lanes. Nothing is selected, so the inspector area on the right is empty.
The footer has Snap / Interval (the interval is greyed out until Snap is ticked), Bezier curves, Animation Mode (with Play and a time readout while it's on) and Close.
Float animation is organised by entity. Each entity node in the tree can hold one or more parameter tracks (for example position.x, a float parameter name, and so on).
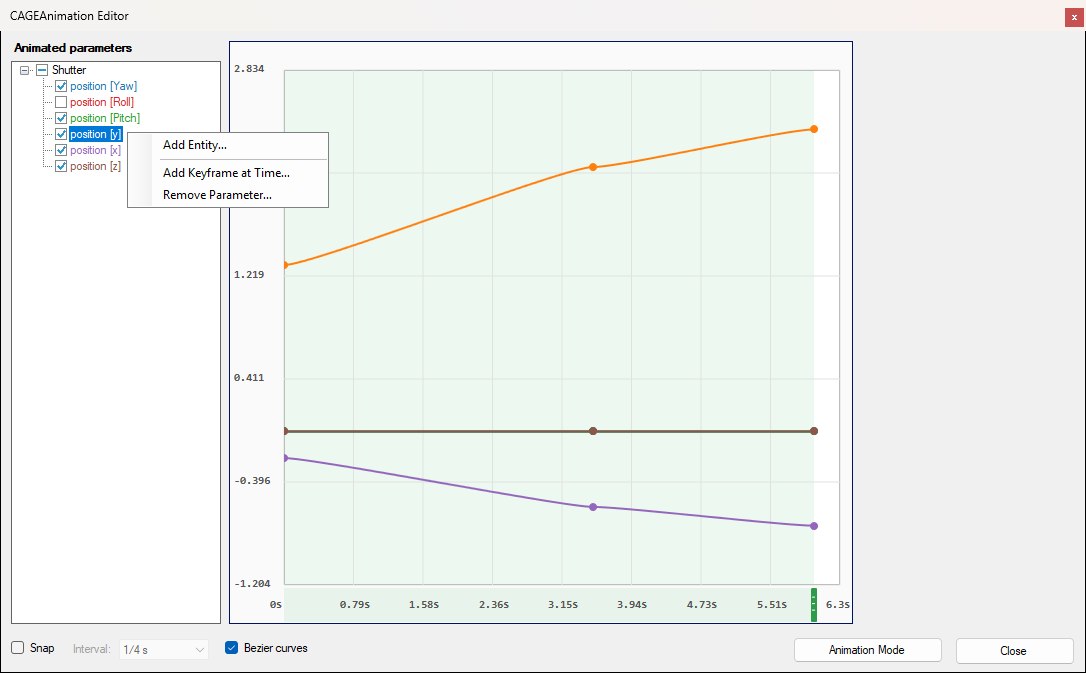
Right-click in the track tree. What the menu offers depends on the node under the cursor — below it is open on a parameter node:
Use the checkbox glyphs on entity and parameter nodes to show or hide curves. Parent entities can show a mixed state when only some child tracks are visible. Clicking a node label frames that entity’s (or parameter’s) tracks in the graph.
Each visible float track is drawn as a coloured curve. When the cursor is near a curve, that line thickens so you can tell which track you are targeting. Below, the middle keyframe of a shutter's position [y] track is selected: with Bezier curves on, its tangent handles are drawn either side of it, and the Keyframe panel on the right shows its value. The position [Roll] track has been unticked in the tree, which is why the entity node shows the mixed state.
![A selected keyframe on the shutter's position [y] curve with its bezier tangent handles, and the Keyframe inspector showing its value and a Delete Keyframe button.](img/keyframe-selected.jpg)
Wall_Mid_View's shutter animation in SCI_HUB, with position [y]'s middle keyframe selected.
Event tracks are horizontal lanes under the float graph. Right-click anywhere on the graph (plot, lanes, or empty area) to add one:
CAGEAnimation itself.Right-click a lane for Add Event Here or Delete Event Track. Drag the grip between the plot and the lanes to resize lane height. Shift+click a lane also adds an event at that time.
String event keyframes store a forward event name. Selecting one on the yellow lane opens the Event panel, as shown below.
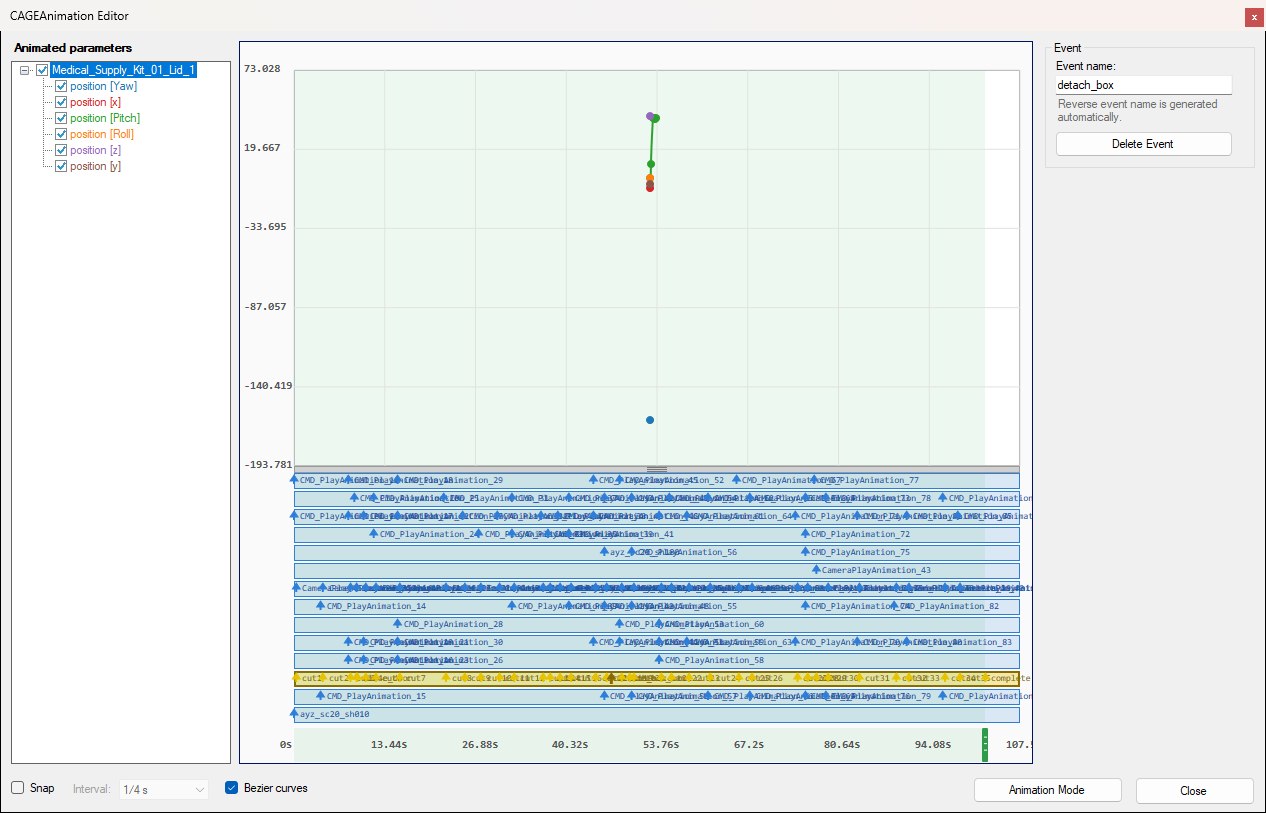
detach_box at 47 s on cutscene_20's string lane; the forward name is edited here and the reverse_ pin is derived from it.
CAGEAnimation node — the same pattern as TriggerSequence method pins.Clicking a string event lane (not a keyframe) does not open a side panel — there are no entity bindings to edit.
These tracks link the timeline to entities that play animations.
Track bindings — click the blue lane (with no keyframe selected) to show the Animation Entity Track panel and its three slots, pictured below:
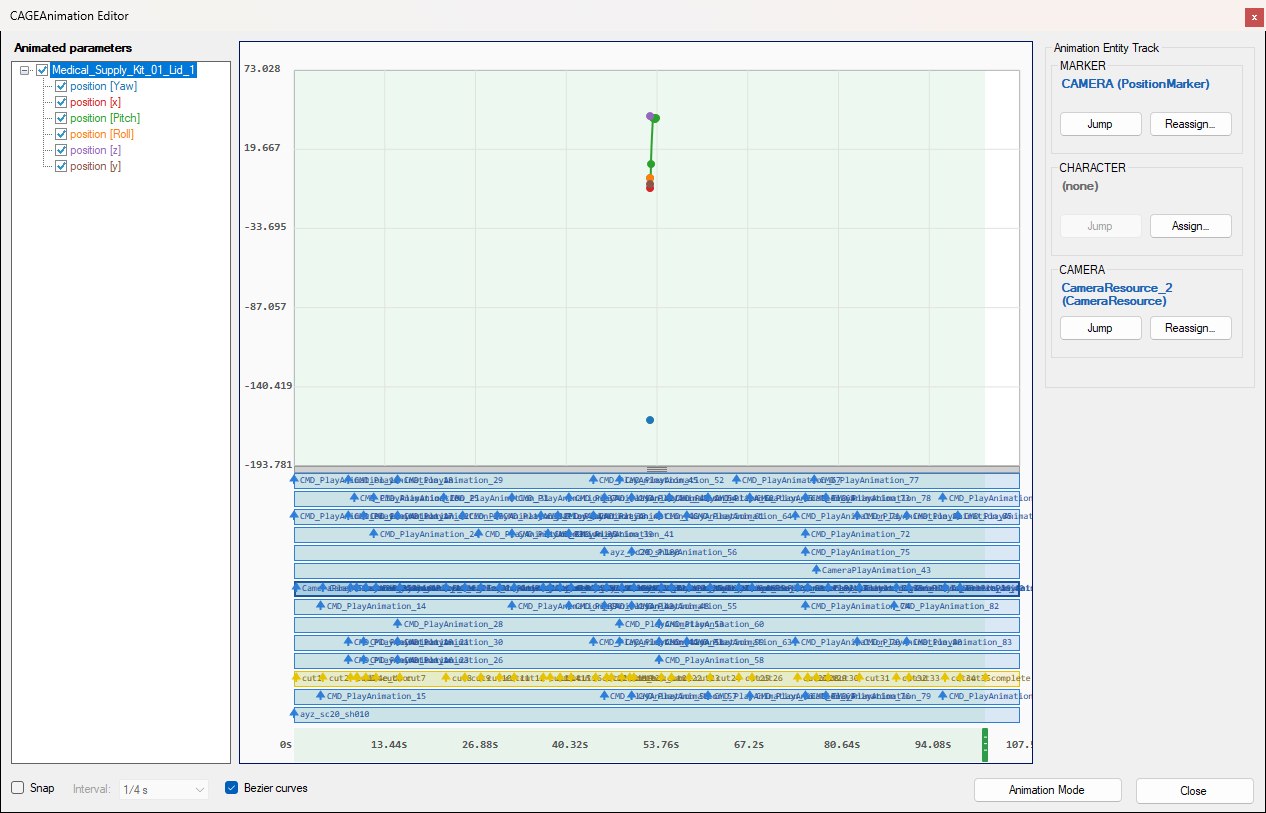
A camera lane from cutscene_20: MARKER and CAMERA are bound (Jump / Reassign…), CHARACTER is still empty (Assign…).
These bound objects are linked to the play-animation entity on the event track, supplying context such as convergence positions and associated characters.
Each slot shows the assigned entity's name and type (bold, coloured, and respecting Show entity IDs), with Jump and Assign… / Reassign…. Empty slots read (none) with Jump disabled, and create a new connection for that binding type when you assign — in the shot above, the camera lane's MARKER and CAMERA are bound and CHARACTER is still empty.
Keyframes on these tracks pick a play-animation entity:
CMD_PlayAnimationCameraPlayAnimationPlayEnvironmentAnimationThe linked animation entity plays when the time marker reaches that keyframe on the event timeline.
Selecting one of these keyframes opens the Animation Entity panel with the linked entity's name and type, Open in Inspector, Reassign… and Delete Keyframe, as below. Marker labels on the timeline use the entity display name.
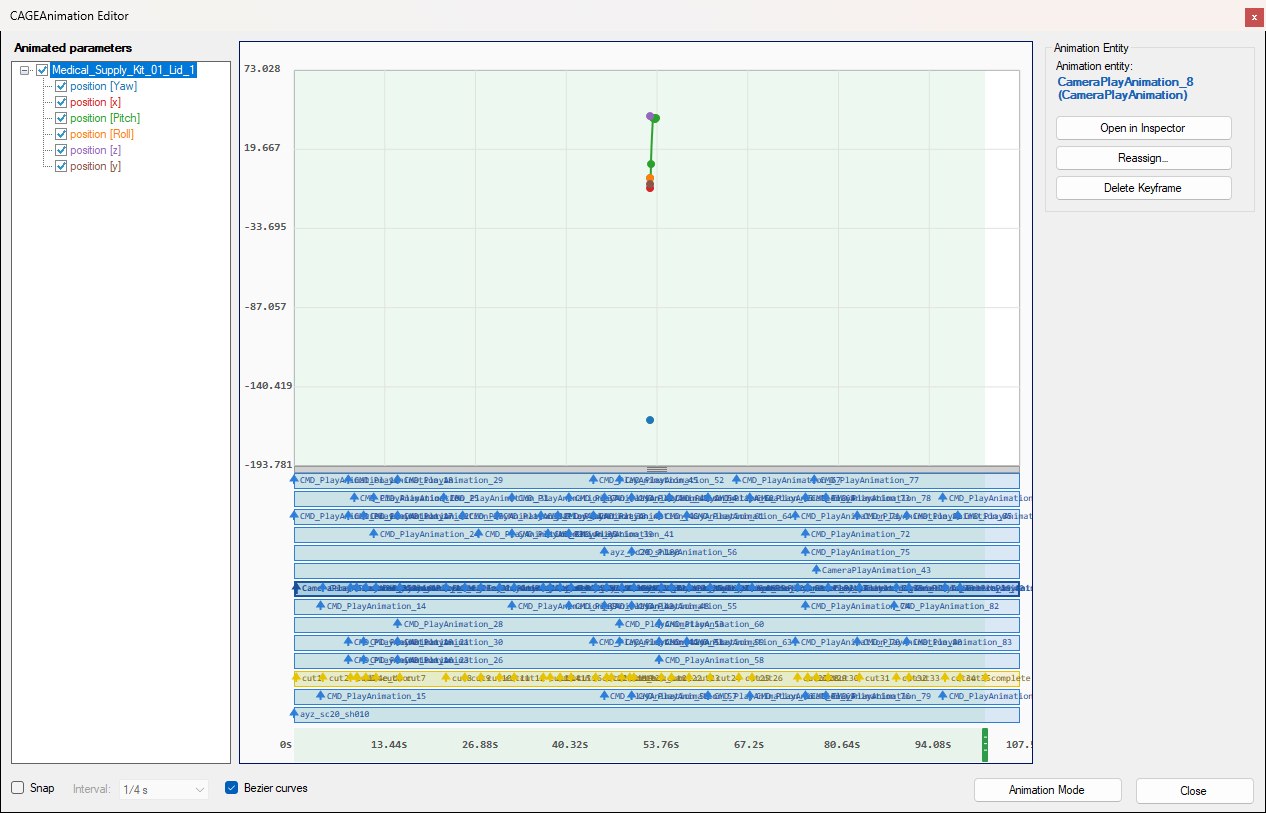
A timeline tells you the numbers; Animation Mode shows you the motion. With it on, the editor drives the Viewport from a playhead, so a door swings, a camera tracks or a light moves as you scrub — and moving something out in the 3D view becomes a keyframe. It needs the Viewport: with the 3D view off, the button says so.
The one rule everything follows: Animation Mode never changes an entity's own values. An entity's position is where it rests when nothing is playing, and the animation is the only thing that moves it. That's what makes leaving the mode safe at any moment — everything the preview moved goes straight back where it was.
Click Animation Mode in the footer (it becomes Exit Animation Mode, in bold, while it's on). A playhead appears on the timeline — a red line down the graph and lanes, with its time labelled at the top — with Play and a time readout beside the button, as shown below:
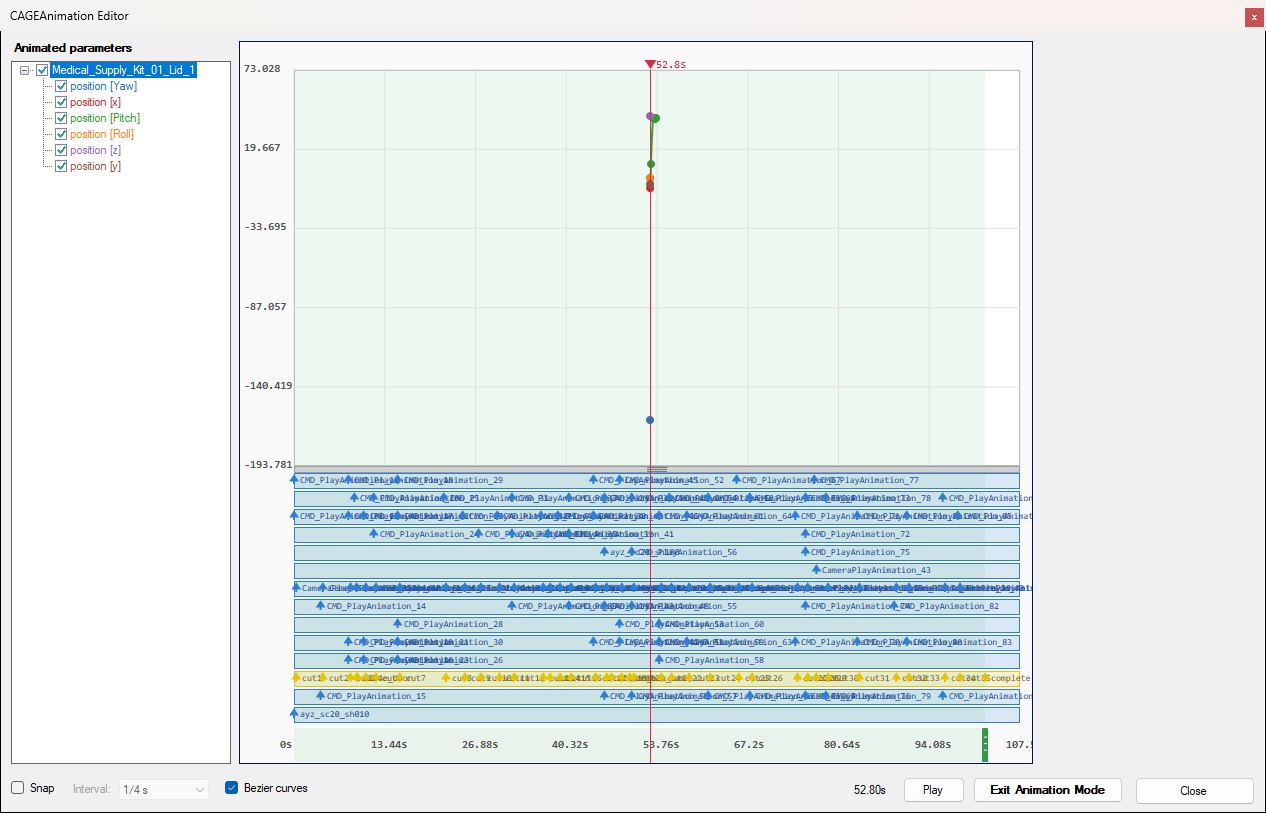
Animation Mode on, with the playhead parked at 52.80 s on cutscene_20's lid-opening keyframes; the footer button now reads Exit Animation Mode in bold.
Which things move depends on where you came from. A CAGEAnimation addresses its targets relative to its own composite, and the same composite can be instanced many times over, so the hierarchy you stepped through to reach the animation is what decides which placement is previewed. Open the editor from inside the instance you want to watch.
Only the entity's position parameter is previewed — x, y, z and yaw, pitch, roll. Float parameters on lights, sounds and the like are animated in-game as normal, but there's nothing in the Viewport to show them on.
With the game running and Live Link connected, an In game box appears beside Animation Mode. Leave it ticked (it is by default, and OpenCAGE remembers your choice) and Animation Mode plays the animation in the running game as well as the Viewport. The game uses its own animation code, so it shows everything the animation drives, including lights and other float parameters, not just positions.
A row under the timeline says what the game is doing, such as Game: held at 1.25 s or Game: playing 2.10 s, or why it can't show it. Common reasons:
Animation Mode can run on the game alone: with In game ticked you don't need the Viewport open. Cinematic animations (the ones that play a cutscene) can't be driven in the game yet.
Put the playhead where you want a keyframe, select the entity in the Viewport and move it with the transform gizmo. Instead of changing the entity's position, the move is recorded as keyframes at the playhead — on the animation's tracks for that entity, adding them (and the connection) if the entity wasn't in the animation yet. A drag is one undo step, however many values it wrote. The same goes for a value typed into the inspector while the mode is on, for an existing FLOAT or TRANSFORM parameter the animation can reach; adding a parameter the entity didn't have, or editing several entities at once, is applied to the entity as normal.
Anything the animation can't reach from its composite is edited normally, so you can still fix up scenery around the thing you're animating without leaving the mode.
The inspector shows what an animation controls: parameters driven by a CAGEAnimation in the hierarchy you're in get a purple value cell, alongside the blue and orange ones described in the Scripting Intro.
There is nothing to save. Every edit — a keyframe moved, a track added, an event renamed, a binding changed — is written to the CAGEAnimation as you make it, and anim_length is kept up to date from the timeline. The inspector shows a new length, in bold as a changed value, a moment after you set it, while this window is still open. Close just closes the window (and leaves Animation Mode if it's on).
Each edit is an undo step in the main editor: Edit → Undo (or Ctrl+Z with the main window focused — the shortcut doesn't work inside this window) takes it back even while this window is open, and the window picks up the restored tracks. A gizmo drag in Animation Mode counts as one step, not one per value it recorded.
An event's pins on the CAGEAnimation node exist for as long as some keyframe uses that event name; removing the last one removes the forward and reverse pins. Deleting an event with the inspector's Delete Event button, or deleting a whole event track, warns first if any of the pins going away still have flowgraph connections. Renaming an event, or deleting one from the graph's right-click menu, doesn't — so check the node after those.
