The Character Editor configures how a Character looks and sounds for a specific placement in the level. It edits character accessory sets — body-part composites, skeleton choice, asset-set colours/decals, voice, demographic attributes, and foley — stored in the level’s CHARACTERACCESSORYSETS.BIN.
This is separate from the entity parameters on the Character node itself (class, alliance, anim sets, and so on). Those stay in the Entity Inspector; the Function editor covers the accessory-set data tied to each composite instance of that character.
The window closes if you reload commands, select a different entity, or switch composite.
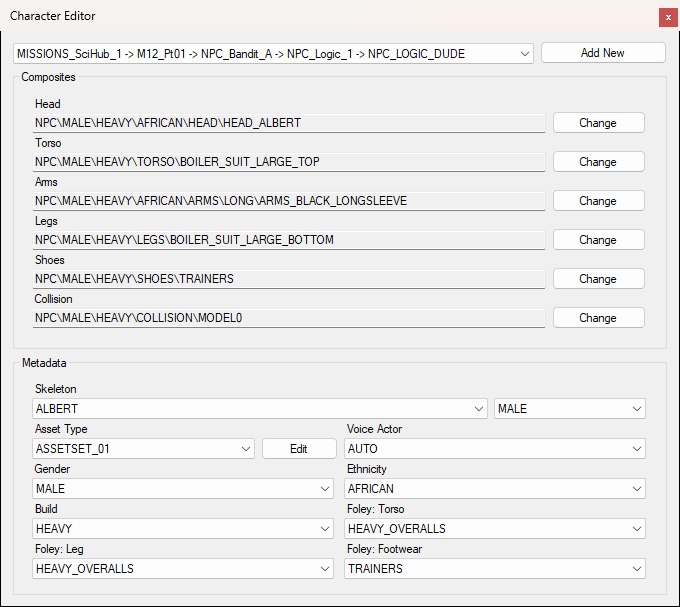
NPC_LOGIC_DUDE in SCI_HUB: the dropdown names the placement by its resolved hierarchy path, and every composite slot and metadata field below belongs to that one placement.
A single Character entity can appear in more than one place in the level hierarchy. Accessory sets are keyed by composite instance, so each placement can have its own look.
Until at least one instance exists in the dropdown, the Change buttons and the Metadata dropdowns stay disabled (only Add New and the asset-set Edit button remain available).
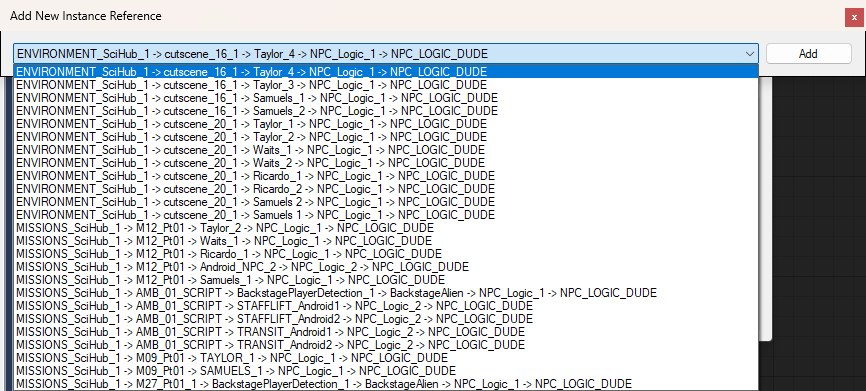
Add New lists only the placements of this character that still need an accessory set; pick one and click Add.
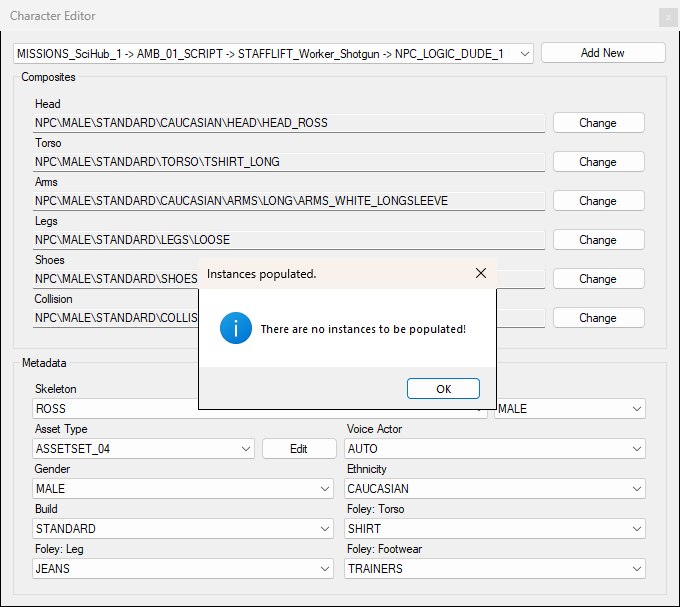
Every placement of NPC_LOGIC_DUDE_1 already has an entry, so Add New shows this message instead of the picker.
The Composites group assigns the body-part composites for the selected instance. Each slot shows the current composite name (read-only) and a Change button that opens the composite picker:
The picker (shown below) opens with the slot’s current composite already selected in the tree, and the selected composite’s preview picture beside it: the same picture the composite browser shows (see Composite Previews). To filter composites by name or folder (by name only while Search Only Composite Names is on), type in the search box and press Search or Enter (the red X button clears it), then click Select Composite to update that slot immediately on the accessory-set entry. Untick Show Preview, under the tree, to hide the preview; it’s the same setting as in the Create Composite Instance Entity window. The window can be resized.
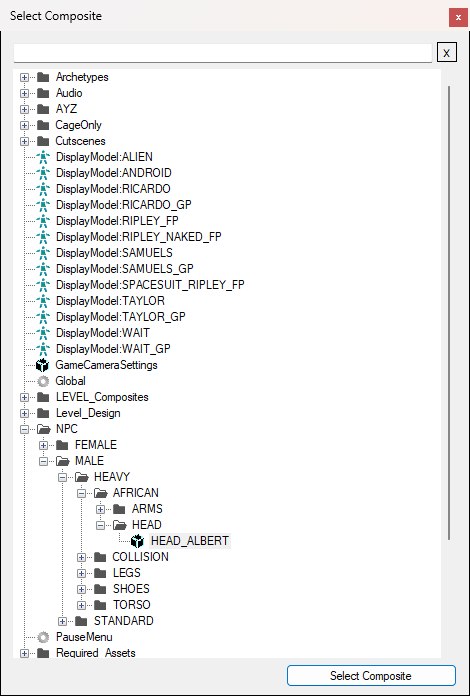
The picker for the Head slot: the tree opens with the current HEAD_ALBERT composite selected under NPC\MALE\HEAVY\AFRICAN\HEAD, and its preview on the right.
The Metadata group covers skeleton, asset set, voice, attributes, and movement foley for the selected instance.
Skeleton choice is split into two related dropdowns:
MALE or FEMALENPC, taken from the game’s skeleton definitions). Changing the group refreshes which skeleton names the wide list offers.Asset Type picks a CUSTOM_CHARACTER_ASSETS set (colours and decals used for customizable NPC clothing).
Click Edit next to Asset Type to open the Character Asset Editor (titled Edit Character Asset Sets), which edits the global CUSTOMCHARACTERASSETDATA.BIN file (primary / secondary / tertiary colours and decal lists per asset set). That window (shown below) is shared config data, not per-instance accessory-set fields; the same editor is also available without a character selected from View → Configuration Editors → Characters → Asset Sets.
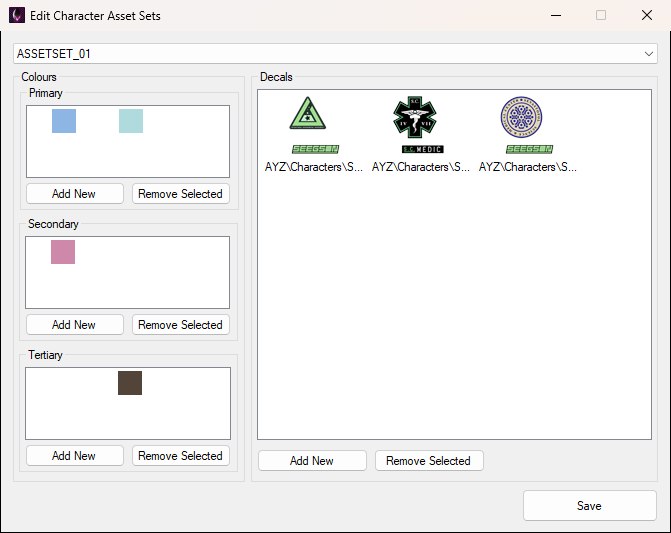
ASSETSET_01: the three colour lists and the decal list each have their own Add New and Remove Selected buttons; Save writes CUSTOMCHARACTERASSETDATA.BIN straight away.
Changing any of these updates the selected accessory-set entry immediately.
There is no separate Save button in the Character Editor. Edits write straight into the loaded level’s accessory-set data. Persist them with the usual level save — OpenCAGE writes CHARACTERACCESSORYSETS.BIN as part of saving the level.
Asset-set colour/decal edits made via Edit live in CUSTOMCHARACTERASSETDATA.BIN. That window has its own Save button, which writes the file immediately and closes the window; closing it without saving discards the changes.
Character entity; whether a custom accessory set is meaningful still depends on how that character is configured in the graph (for example custom-character parameters).